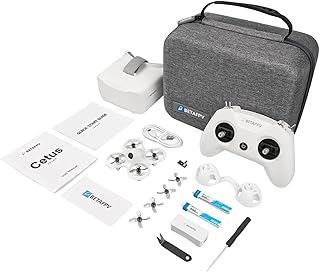
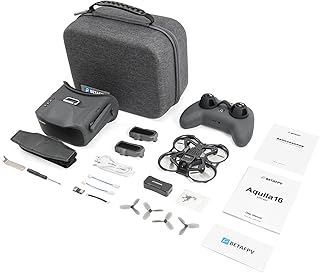
The Ultimate BETAFPV Drone Setup Guide
This guide will walk you through building a complete BETAFPV drone setup, from choosing the right frame to configuring your flight controller and tuning your quad for optimal performance.
Part 1: Choosing Your Components
1. Frame:
* Beginner: BETAFPV 85X, 95X, or 115X are excellent starting points. They are durable, lightweight, and readily available.
* Intermediate: Look at frames like the BETAFPV Cetus, Meteor, or LiteHawk. These offer more versatility and customization options.
* Advanced: For serious freestyle and racing, consider the BETAFPV Dragon, the Comet, or the freestyle-focused frame like the 90X or 100X.
2. Motors and ESCs:
* Beginner: BETAFPV 1104 6000KV motors with matching 1S ESCs are a solid choice.
* Intermediate: Upgrade to 1106 4500KV or 1105 6000KV motors with 2S ESCs for more power.
* Advanced: Go for 1106 4000KV or even 1107 4000KV motors paired with 2S or 3S ESCs for exceptional speed and responsiveness.
3. Flight Controller:
* Beginner: The BETAFPV F4 FC is a great starting point. It offers a good balance of features and affordability.
* Intermediate: Consider the BETAFPV F7 FC for more processing power and faster response times.
* Advanced: Explore options like the BETAFPV F4 4in1 ESC FC or the F7 4in1 ESC FC for an all-in-one solution.
4. Receiver:
* Beginner: The BETAFPV Frsky XM+ or Flysky AFHDS 2A receiver is a simple and reliable option.
* Intermediate: Explore the Frsky R-XSR or the Flysky iA6B receiver for better range and performance.
* Advanced: Consider receivers like the Frsky R9M Mini or the Crossfire Nano for ultra-low latency and long-range capabilities.
5. Battery:
* Beginner: BETAFPV 300mAh 1S batteries are a good starting point.
* Intermediate: Go for 450mAh 1S or 300mAh 2S batteries for more flight time.
* Advanced: Choose 650mAh 2S or 450mAh 3S batteries for extended flight time and power.
6. Propellers:
* Beginner: BETAFPV 40mm 3-blade propellers are a good starting point.
* Intermediate: Experiment with 45mm 3-blade or 40mm 5-blade props for different flight characteristics.
* Advanced: Choose high-performance propellers designed for specific freestyle or racing styles.
7. Camera:
* Beginner: The Caddx Turtle V2 or the Foxeer HS1177 camera is a popular choice.
* Intermediate: Explore cameras like the Caddx Ratel or the Runcam Nano 3 for better image quality and features.
* Advanced: Choose high-end cameras like the Runcam Split 3 or the Caddx Vista for exceptional image quality and low latency.
8. VTX:
* Beginner: The BETAFPV 25mW VTX is a reliable and affordable option.
* Intermediate: Consider the BETAFPV 600mW VTX for more power and range.
* Advanced: Look at VTXs like the BETAFPV 1200mW VTX or the ImmersionRC Tramp for long-range capabilities and high-power output.
9. Antenna:
* Beginner: A simple omni-directional antenna is sufficient for most beginners.
* Intermediate: Consider a circular polarized antenna for improved signal reception.
* Advanced: Choose a high-gain directional antenna for longer range and better signal penetration.
Part 2: Building Your Drone
1. Assemble the Frame:
Follow the instructions provided with your frame to assemble the arms, top plate, and bottom plate. Make sure all screws are securely tightened.
2. Mount the Motors and ESCs:
Securely mount the motors to the arms using the provided mounting hardware. Ensure the motor wires are properly connected to the ESCs.
3. Mount the Flight Controller:
Secure the flight controller to the frame, ensuring the mounting holes align correctly. Connect the ESC wires to the flight controller according to the wiring diagram.
4. Mount the Receiver:
Connect the receiver to the flight controller, ensuring the binding process is complete.
5. Mount the Battery:
Choose a battery strap that fits your battery and frame. Secure the strap to the frame, allowing for easy battery removal.
6. Mount the Camera and VTX:
Secure the camera and VTX to the frame using the provided mounting hardware. Ensure the camera's field of view is clear and the VTX antenna is properly mounted.
Part 3: Configuring and Tuning
1. Configure the Flight Controller:
* Connect to your computer: Use a USB cable to connect your flight controller to your computer.
* Install Betaflight: Download and install the Betaflight software on your computer.
* Configure the receiver: Select the appropriate receiver type in Betaflight and bind it to your transmitter.
* Calibrate sensors: Follow the on-screen prompts in Betaflight to calibrate the accelerometer, gyroscope, and magnetometer.
2. Tune your drone:
* PID tuning: Start with the default PID settings and gradually adjust them to fine-tune your drone's response.
* Filter tuning: Adjust the low-pass filter and other filter settings to reduce noise and improve stability.
* Rate and expo tuning: Fine-tune the rate and expo settings to match your flying style.
3. Test your drone:
* Start with a low throttle: Slowly increase the throttle to test the drone's response and stability.
* Perform a hover test: Ensure the drone hovers stably without drifting.
* Fly in an open area: Practice your flying skills in a safe and open area.
Additional Tips:
* Use a battery checker: Monitor your battery voltage to prevent over-discharging.
* Use a prop balancer: Balance your propellers to reduce vibration.
* Keep your drone clean: Clean your drone regularly to prevent dust and debris buildup.
* Practice safe flying: Always fly in a safe and responsible manner.
This is a comprehensive guide to building a BETAFPV drone setup. Remember to start with the beginner options and gradually upgrade as you gain experience. Happy flying!


