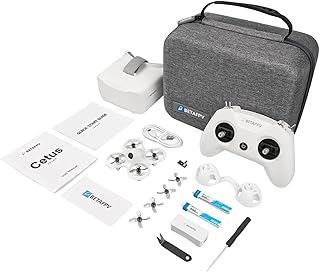
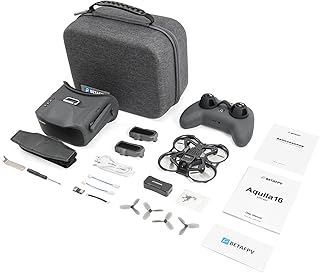
Building Your Own BETAFPV Drone: A Step-by-Step Tutorial
Building a custom drone can be an incredibly rewarding experience, giving you complete control over your aerial adventure. This tutorial will guide you through the process of building a BETAFPV drone, using their popular "Lite" series as an example.
Before You Begin:
* Choose Your Frame: BETAFPV offers various frame options, including the Lite series, which is popular for its lightweight and compact design.
* Decide on Your Flight Style: Are you looking for freestyle, cinematic, racing, or something else? Your choice will influence component selection.
* Gather Your Tools: You'll need a soldering iron, wire strippers, screwdrivers, tweezers, and a multimeter.
Step 1: Select Components
* Frame: Choose your desired BETAFPV Lite frame. The Lite 75S or Lite 85S are good options for beginners.
* Flight Controller: BETAFPV offers a range of F3 or F4 flight controllers, each with specific features. The F4 1S FC is a popular choice.
* Motors: Choose motors based on your desired flight characteristics. Brushless motors, like the 1103 7500KV, are common.
* ESC (Electronic Speed Controller): Choose an ESC that matches your motor type. BETAFPV offers 4-in-1 ESCs, such as the 4-in-1 BLheli_S 2-4S.
* Battery: LiPo batteries are standard for drones. Consider factors like capacity (mAh), voltage (S), and discharge rate (C).
* Propellers: BETAFPV provides various propeller sizes and blade types.
* Receiver: Choose a receiver compatible with your radio transmitter. BETAFPV offers FrSky and Flysky receivers.
* VTX (Video Transmitter): A VTX transmits the video signal from your camera to your goggles. Choose a VTX with the desired output power and frequency band.
* Camera: A micro camera is needed for FPV. BETAFPV offers various camera options.
* Antenna: Choose an antenna compatible with your VTX.
* Goggles: You'll need FPV goggles to view the video feed.
Step 2: Assemble the Frame
1. Mount the Flight Controller: Secure the FC to the frame using the provided standoffs and screws.
2. Install the Motors: Mount the motors to the frame using the appropriate screws.
3. Connect the Motors to the ESC: Solder the motor wires to the corresponding pads on the ESC. Ensure correct polarity (positive to positive, negative to negative).
Step 3: Wire the ESC and Flight Controller
1. Connect the ESC to the Flight Controller: Connect the ESC to the FC using the provided wires. Most ESCs have three wires: signal (SIG), power (BAT), and ground (GND). Consult your FC's documentation for pin connections.
2. Solder the Battery Connector: Solder the battery connector to the FC's battery pad.
Step 4: Install the VTX and Camera
1. Mount the VTX: Secure the VTX to the frame, ensuring proper airflow for cooling.
2. Connect the VTX to the Flight Controller: Connect the VTX to the FC's VTX output using a suitable cable.
3. Install the Camera: Mount the camera to the frame.
4. Connect the Camera to the VTX: Connect the camera to the VTX's input.
Step 5: Connect the Receiver and Bind
1. Mount the Receiver: Secure the receiver to the frame.
2. Connect the Receiver to the Flight Controller: Connect the receiver to the FC's receiver input.
3. Bind the Receiver to the Transmitter: Follow the instructions for your receiver and transmitter to establish a link.
Step 6: Initial Setup and Testing
1. Flash the Flight Controller: Flash the firmware to your FC using a program like Betaflight Configurator.
2. Configure the Flight Controller: Adjust settings like PID tuning, throttle mapping, and receiver settings.
3. Test the Motors: Power up the drone and check if all motors spin in the correct direction.
4. Calibrate the ESC: Follow the instructions for your ESC to calibrate it.
Step 7: First Flight
1. Start Slowly: Begin with a few gentle hover tests.
2. Get Familiar with the Controls: Practice navigating the drone in a safe, open area.
3. Gradually Increase Skill Level: As you become more comfortable, try basic maneuvers like flips and rolls.
Important Safety Tips:
* Always fly in a safe, open area away from people and objects.
* Use a high-quality battery and charger.
* Never fly near airports or other restricted airspace.
* Learn about battery safety and proper disposal.
Additional Notes:
* This is a basic tutorial. For more detailed information and advanced settings, refer to BETAFPV's documentation and the Betaflight Wiki.
* Consider joining a local drone club or community to learn from experienced pilots.
* Always prioritize safety and have fun!
This tutorial provides a stepping stone for building your own BETAFPV drone. Building a custom drone requires patience, learning, and dedication. By following these steps, you can enjoy the freedom of soaring through the skies with your own creation.


