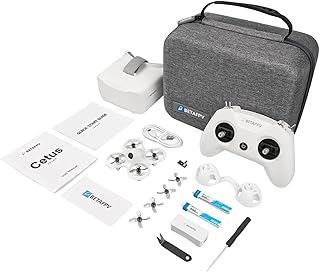
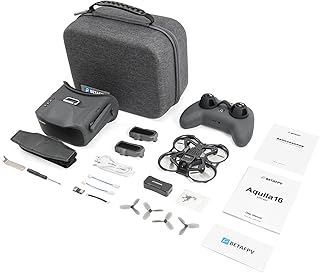
Building Your Own BETAFPV Drone: A Beginner's Guide
Congratulations on embarking on the exciting journey of building your own drone! BETAFPV offers a fantastic platform for beginners with their high-quality, affordable components. Here's a comprehensive guide to help you get started:
1. Choose Your Drone Frame:
* BETAFPV 85X: A popular choice for beginners, offering a good balance of size, weight, and durability.
* BETAFPV 75X: Smaller and lighter than the 85X, ideal for indoor flying.
* BETAFPV 110X: Larger and more powerful, suited for outdoor flying and freestyle.
2. Select Your Flight Controller (FC):
* BETAFPV F4 1S: Compact and lightweight, with a built-in PDB (Power Distribution Board) for easier wiring.
* BETAFPV F411 AIO: A more advanced option with features like a built-in OSD (On-Screen Display) and barometer.
3. Choose Your Motors and Propellers:
* BETAFPV 1103 7500KV: Popular for 1S and 2S setups, offering good power and efficiency.
* BETAFPV 1106 3100KV: Designed for 3S setups, providing more power for aggressive flying.
* Propellers: Start with 2.5-inch or 3-inch propellers for 1S setups and 3-inch propellers for 2S and 3S setups.
4. Select Your Battery:
* BETAFPV 1S 450mAh: A great starting point for 1S setups, offering good flight time.
* BETAFPV 2S 450mAh: Provides more power and a shorter flight time.
* BETAFPV 3S 450mAh: Offers the most power but with the shortest flight time.
5. Choose Your Video Transmitter (VTX):
* BETAFPV 25mW VTX: A good starting option for indoor or short-range outdoor flying.
* BETAFPV 50mW VTX: Provides a longer range, ideal for outdoor flying.
* BETAFPV 100mW VTX: Offers the longest range, suitable for long-range flying.
6. Choose Your Camera:
* BETAFPV Caddx Nano: A compact and lightweight camera with good image quality.
* BETAFPV Caddx Turtle: A slightly larger camera offering higher resolution and better image quality.
7. Assemble Your Drone:
* Frame: Carefully assemble the frame according to the manufacturer's instructions.
* Flight Controller: Mount the FC on the frame, ensuring proper alignment.
* Motors and Propellers: Mount the motors on the frame and attach the propellers.
* Battery: Secure the battery on the frame using velcro or a strap.
* Video Transmitter and Camera: Mount the VTX and camera on the frame, ensuring they are positioned for optimal video transmission.
8. Configure Your Flight Controller:
* Connect to your computer: Use a USB cable to connect the FC to your computer.
* Install Betaflight: Download and install Betaflight software from the official website.
* Configure settings: Use Betaflight to adjust the flight controller settings such as PID tuning, throttle calibration, and receiver binding.
9. Bind Your Receiver:
* Choose a receiver: Select a receiver compatible with your flight controller and transmitter.
* Bind the receiver: Follow the instructions from the receiver manufacturer to bind it to your transmitter.
10. First Flight:
* Charge your battery: Make sure the battery is fully charged before your first flight.
* Test in a safe environment: Begin by practicing in a large open area with no obstacles.
* Take it slow: Start with low throttle and gradually increase the power as you gain confidence.
* Learn basic controls: Familiarize yourself with the controls of your transmitter and practice basic maneuvers.
Additional Tips:
* Invest in a good quality LiPo charger: A safe and efficient charger is essential for long-term battery health.
* Use protective gear: Always wear safety glasses and a helmet when flying your drone.
* Practice regularly: The more you fly, the more comfortable you will become with your drone.
* Join the community: Connect with other drone enthusiasts online or at local events.
Enjoy the Journey!
Building your own drone can be challenging but immensely rewarding. Be patient, learn from your mistakes, and above all, have fun! The world of FPV is vast and there's always something new to learn.


