Building Your Own Drone: A Beginner's Guide to DIY Aeronautics
Introduction:
Building your own drone can be an incredibly rewarding experience, offering a blend of engineering, electronics, and programming. This guide provides a beginner-friendly approach to get you started on your DIY drone journey.
Step 1: Understanding the Basics
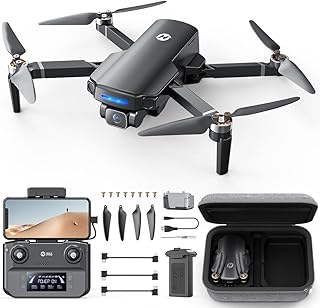
* Components: Drones consist of a frame, motors, propellers, battery, flight controller, ESCs (electronic speed controllers), receiver, and transmitter.
* Flight Control: The flight controller acts as the brain of your drone, responsible for processing data from sensors and controlling motor speeds.
* Power: The battery provides the energy for your drone, while ESCs regulate motor speed.
* Communication: The receiver and transmitter allow you to control the drone wirelessly.
Step 2: Choosing Your Kit
* Beginner Kits: Numerous kits are available for beginners, including pre-assembled frames and pre-flashed flight controllers. These kits simplify the building process and provide all the necessary components.
* DIY Build: If you prefer a more hands-on experience, you can purchase individual components and assemble your drone from scratch. This allows for greater customization but requires more technical knowledge.
Step 3: Assembling the Drone
* Frame: Assemble the frame following the instructions provided with your kit.
* Motors and Propellers: Attach the motors and propellers securely to the frame, ensuring correct orientation.
* Battery: Connect the battery to the flight controller and ESCs.
* Flight Controller: Mount the flight controller on the frame and connect the ESCs, receiver, and other sensors.
Step 4: Configuring the Flight Controller
* Firmware: Install the appropriate firmware on the flight controller using a software application like OpenPilot or Betaflight.
* Calibration: Calibrate the motors and ESCs according to the flight controller's instructions.
* Settings: Adjust settings such as throttle response, PID values, and other parameters to fine-tune your drone's flight characteristics.
Step 5: First Flight and Fine Tuning
* Safety: Always practice in a safe and open area.
* Initial Flight: Start with short and low altitude flights to get familiar with your drone's handling.
* Fine Tuning: Observe your drone's flight behavior and adjust settings as needed to improve stability, responsiveness, and control.
Step 6: Advanced Features
* Camera: Add a camera to your drone for aerial photography and videography.
* GPS: Integrate a GPS module for autonomous flight and return-to-home functionality.
* Sensors: Install additional sensors like barometers and ultrasonic sensors for altitude control and obstacle avoidance.
Tips and Resources
* Online Communities: Join online forums and communities for drone enthusiasts to share your experiences, get support, and learn from others.
* Tutorials and Guides: Numerous online resources provide detailed tutorials and guides for building and configuring drones.
* Safety First: Always prioritize safety and follow local regulations for drone operation.
Conclusion:
Building your own drone is an exciting project that allows you to delve into the world of aeronautics and robotics. Start with a beginner kit, understand the basic principles, and gradually explore advanced features. With patience, dedication, and a passion for DIY, you can build a drone that will soar high above the clouds.


