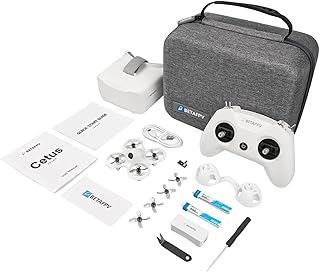
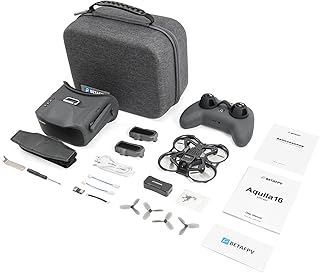
Building a Custom FPV Drone from Scratch with BETAFPV: A Guide
Building your own FPV drone is an incredibly rewarding experience, combining technical skills with creativity. BETAFPV offers a wide range of components, making it a great choice for beginners and experienced builders alike. This guide will walk you through the process of building a custom FPV drone from scratch, using BETAFPV components.
I. Choosing Your Frame
* Frame Size: The size of your frame determines its weight, maneuverability, and battery capacity.
* Tiny Whoop: Ideal for indoor flying, these are small and agile.
* 3-Inch: A good balance between size and maneuverability.
* 4-Inch: More powerful and stable for outdoor flying.
* 5-Inch: Larger and more stable for long-range flights.
* Frame Material:
* Carbon Fiber: Strong and lightweight, ideal for high-performance builds.
* Plastic: More affordable and durable, suitable for beginners.
* Frame Type:
* X-Frame: The most common design, offering good balance.
* H-Frame: Provides more space for components.
* Mini-H: Combines the advantages of both X and H frames.
II. Power System
* Motors: Choose motors based on frame size and desired performance.
* KV Rating: Higher KV motors are more powerful but consume more battery.
* Thrust: Measured in grams, higher thrust allows for faster flight.
* ESC (Electronic Speed Controller): Determines how the motor responds to throttle input.
* Amperage: Higher amperage ESCs are more powerful.
* Battery: Choose a battery based on the frame size and flight duration.
* Capacity (mAh): Higher capacity batteries provide longer flight time.
* C Rating: A higher C rating allows for faster discharge, resulting in more power.
* Lipo Battery Connector: Choose a connector that matches your battery and ESC.
III. Flight Controller and Receiver
* Flight Controller: The brain of your drone, responsible for processing sensor data and controlling the motors.
* Flight Controller (FC): Choose a flight controller based on the frame size and desired features.
* Betaflight: Open-source flight controller software, widely used in the FPV community.
* Receiver: Receives signals from the transmitter and sends them to the flight controller.
* Receiver Type: Choose a receiver that is compatible with your transmitter.
IV. FPV System
* Camera: Captures the video feed and transmits it to the ground station.
* Resolution: Higher resolution cameras provide better video quality.
* Field of View (FOV): Wider FOVs allow for better situational awareness.
* Video Transmitter (VTX): Transmits the video signal from the camera to the receiver.
* Power Output (mW): Higher power output allows for longer range.
* Frequency: Choose a frequency that is not crowded in your area.
* Antenna: Amplifies the signal from the VTX.
* Type: Linear, circular, or cloverleaf antennas offer different properties.
* Goggles or Monitor: Displays the video feed from the drone.
V. Assembling Your Drone
1. Assemble the frame: Secure the arms, top and bottom plates, and any additional components.
2. Install the motors: Ensure they are securely mounted and connected to the ESCs.
3. Mount the ESCs: Position them strategically on the frame and connect them to the flight controller.
4. Install the flight controller: Secure it on the frame and connect the ESCs, receiver, and battery.
5. Mount the camera and VTX: Choose locations that provide optimal video feed and signal strength.
6. Connect the antenna: Ensure it is properly mounted and connected to the VTX.
7. Calibrate the motors and ESCs: Use Betaflight to properly calibrate the motors and ESCs.
VI. Configuring Betaflight
* Configure Receiver: Ensure the flight controller can communicate with the receiver.
* Set up PID parameters: Fine-tune the drone's stability and responsiveness.
* Configure the camera and VTX: Set the transmission frequency and power output.
VII. First Flight
* Start with a safe environment: Choose a large open area with no obstacles.
* Practice in a controlled environment: Start with small movements and gradually increase the throttle.
* Be aware of your surroundings: Always pay attention to your surroundings and avoid flying near people or property.
VIII. Tips and Recommendations
* Start with a beginner-friendly frame and components.
* Invest in high-quality batteries and a charger.
* Watch tutorials and videos to learn about the different components and configurations.
* Be patient and persistent: Building a drone takes time and practice.
* Join the FPV community: Seek advice and support from other enthusiasts.
Building your own FPV drone is a rewarding journey. By carefully following these steps and leveraging the resources available from BETAFPV, you can create a custom drone that perfectly suits your needs and flying style. Remember to always prioritize safety and enjoy the exciting world of FPV flying!


