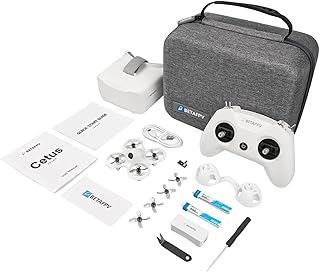
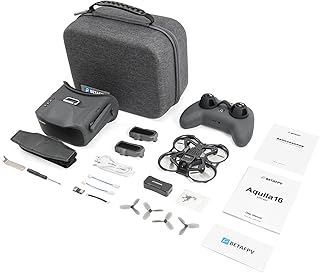
Building a BETAFPV Drone from Scratch: A Comprehensive Guide
Building a BETAFPV drone from scratch can be a rewarding experience, allowing you to customize every aspect of your flying machine. Here's a breakdown of the process:
1. Choosing your components:
* Frame: BETAFPV offers a wide range of frames, from the compact and lightweight Tiny Whoop frames to larger, more powerful freestyle frames. Consider your intended flying style and budget.
* Flight Controller (FC): This is the brain of your drone. BETAFPV offers their own FCs, like the F411 and F722, known for their performance and ease of use.
* Motors: Choose motors based on your frame size and desired flight characteristics. BETAFPV offers motors with different Kv ratings (RPM per volt), affecting power and flight time.
* Electronic Speed Controllers (ESCs): These control the motors. Choose ESCs compatible with your motors and flight controller.
* Battery: LiPo batteries power the drone. Choose a battery with the right voltage, capacity (mAh), and C rating for your setup.
* Propellers: Select propellers matching your motor size and frame design.
* Receiver (RX): Receives commands from your radio transmitter. Choose a compatible RX with your flight controller.
* VTX (Video Transmitter): Transmits your camera footage to the ground station. Consider the power (mW) and frequency (e.g., 5.8 GHz) for your needs.
* Camera: Choose a camera based on your desired image quality and field of view.
2. Assembling your drone:
* Prepare the frame: Install the standoffs and screws to attach the flight controller, ESCs, and other components.
* Mount the FC and ESCs: Securely mount the FC to the frame using standoffs and screws. Attach the ESCs to the motors.
* Connect the components: Connect the motors to the ESCs, the ESCs to the flight controller, and the battery to the FC.
* Wire the VTX and Camera: Connect the VTX and camera to the FC. Consider mounting options for these components.
* Install the RX: Connect the RX to the FC and bind it to your radio transmitter.
* Install the propellers: Choose the correct propeller size and pitch for your motors.
* Calibrate the ESCs: Calibrate the ESCs to ensure they work properly with the motors.
* Configure the flight controller: Use a software like Betaflight to set up the flight controller, calibrate sensors, and configure flight modes.
3. Setting up the radio and ground station:
* Bind the RX to the radio transmitter: Ensure your radio transmitter and receiver are compatible and properly bound.
* Configure the radio: Set up the control sticks, flight modes, and other settings in your radio transmitter.
* Set up the ground station: Connect the ground station to the VTX.
4. Test flights and adjustments:
* Perform initial test flights: Start with short, controlled flights to ensure everything is working correctly.
* Adjust settings and tune the drone: Based on your initial test flights, adjust settings in Betaflight, fine-tune the PID settings, and modify your build to achieve the desired flight characteristics.
Additional Tips:
* Research and learn: There are numerous online resources, tutorials, and forums available to help you build your drone.
* Start with a basic build: For beginners, it's recommended to start with a simpler build to understand the fundamentals before moving on to more complex designs.
* Safety first: Always fly responsibly, follow local regulations, and prioritize safety when flying your drone.
* Enjoy the process: Building your own drone can be a fun and rewarding experience.
Remember: This guide provides a basic framework. Building a drone involves a lot of individual research, experimentation, and practice. Always refer to the specific instructions and documentation provided by BETAFPV and your chosen components.


