

Building Your Own Drone: A Beginner's Guide to DIY
Building your own drone can be an incredibly rewarding and exciting project. It allows you to learn about electronics, programming, and aerodynamics while creating something truly unique. However, it's important to understand that this is not a beginner-friendly endeavor. It requires patience, a willingness to learn, and some technical skills.
This guide will walk you through the essential steps involved in building your own drone, but remember, it's just a starting point. There are many different types of drones and components, and the complexity of the build can vary drastically.
Before You Begin:
* Safety First: Building and flying drones can be dangerous. Always wear safety goggles and follow all local laws and regulations.
* Research and Plan: Understand the different drone types, components, and flight controllers.
* Start Simple: If you're new to electronics, start with a basic quadcopter kit.
* Be Patient: This process takes time and practice. Don't be discouraged by initial setbacks.
Steps to Building Your Drone:
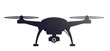
1. Choose Your Drone Type:
* Quadcopter: The most common type, with four rotors. Beginner-friendly and versatile.
* Hexacopter: More stable and powerful than quadcopters, but more complex to build.
* Octocopter: Very stable and powerful, but more challenging to build and fly.
2. Select Your Components:
* Frame: The structure of the drone. Consider size, weight, and material.
* Motors: Provide the power to spin the propellers. Choose appropriate motor size and Kv rating based on your frame and battery.
* Electronic Speed Controllers (ESCs): Control the speed and direction of the motors.
* Propellers: Choose the right size and pitch for your motors and desired flight characteristics.
* Battery: Provides power to the drone. Consider voltage, capacity (mAh), and discharge rate (C rating).
* Flight Controller (FC): The brain of the drone, responsible for controlling flight and stabilization.
* Receiver: Receives commands from the remote controller.
* Transmitter (Remote Controller): Sends commands to the receiver.
* Optional Components: GPS, camera, gimbal, LED lights, etc.
3. Assemble the Drone:
* Frame Assembly: Follow the manufacturer's instructions to assemble the frame.
* Motor and ESC Installation: Mount the motors and ESCs securely to the frame.
* Propeller Installation: Secure the propellers to the motor shafts.
* Flight Controller Setup: Install the flight controller on the frame and connect the necessary components.
* Battery and Receiver Installation: Install the battery and receiver according to their specifications.
* Power and Wiring: Connect the battery, ESCs, and motors to the flight controller.
4. Configure the Flight Controller:
* Calibration: Calibrate the sensors and motors.
* PID Tuning: Adjust the control parameters of the flight controller to achieve stable flight.
* Firmware Update: Update the firmware of the flight controller to ensure compatibility with the latest software.
5. Test Flight and Calibration:
* Ground Test: Test the motors, ESCs, and flight controller before takeoff.
* First Flight: Start with a short and low altitude flight to test the drone's stability.
* Fine-tuning: Adjust the PID settings and other parameters based on the drone's performance.
6. Learning to Fly:
* Practice Makes Perfect: Take your time to learn how to control the drone.
* Use a Simulator: Practice flying in a virtual environment before taking your drone to the real world.
* Beginner Modes: Many flight controllers offer beginner modes that limit the drone's speed and responsiveness.
Resources and Tools:
* Online Forums: Websites like Reddit, DronePilots, and RC Groups offer a wealth of information and help from experienced drone builders.
* YouTube Tutorials: Many tutorials are available on platforms like YouTube that walk you through different aspects of building and flying drones.
* Drone Kits: Consider purchasing a complete drone kit to make the build process easier and more affordable.
* Soldering Iron: You'll need a soldering iron to connect components and wires.
* Multimeter: Helps to test the continuity of circuits and measure voltage.
* Open Source Software: Software like Mission Planner and Betaflight can be used to configure your drone's flight controller.
Remember, building your own drone is a journey. Be patient, enjoy the process, and don't be afraid to ask for help!